♪♪ Kevin: On "Ask This Old House," our experts travel across the country to answer questions about your house.
♪♪ Today, Jenn and Nathan are heading to Tulsa, Oklahoma, to install a rain barrel.
Next, Mark identifies and repairs the cause of pooling water on a small section of a homeowner's brick patio.
And the team discusses a few recent additions to the tool bags that are coming in handy.
All that on "Ask This Old House."
♪♪ Jenn: Nathan and I are here in Tulsa, Oklahoma, the heart of America's oil country.
We got a letter from a homeowner asking for help with installing a rain barrel.
Rain barrels have been used for hundreds of years to harvest and store water, and they're also a very useful tool with stormwater management.
Nathan is already on his way to meet the homeowner, but first, I want to learn more about the ecological impacts of stormwater runoff and how the city of Tulsa is going to mitigate it.
Jenn: Hey, Jacob.
Jacob: Hi.
Nice to meet you.
Jenn: Nice to meet you, too.
Thanks for meeting me here.
And I'd love to hear more about this river.
Jacob: Yeah.
So this is the Arkansas River.
It's one of the U.S.'s largest watersheds.
It flows across seven states, going back all the way up to the Rocky Mountains.
And it's what's called a prairie-braided river.
Jenn: Okay.
Jacob: And it does have a lot of exposed sand-and-gravel areas, but those areas are utilized by different species of fish and wildlife.
And it's a very popular area for Tulsans to recreate, actually.
Jenn: Excellent.
It's good for the humans but also very important for the ecosystem.
Like a little nursery in the estuaries, right?
Jacob: Yes, it is.
And it's very important to protect the water that's flowing into it to keep it clean.
Jenn: And so this is a watershed for all of those other states.
So the watershed is a low point where all the moving water comes to, correct?
Jacob: That's right.
And in our stormwater quality group for the city of Tulsa, it's important to know our watershed so we can help eliminate pollutant sources upstream by eliminating the scouring runoff and pollutant uptake of pollutants from our city before they get into our waterways.
Jenn: What do you consider runoff?
Jacob: So, runoff would be areas that are impervious to rainfall, like rooftops and roads and parking lots, and trying to slow down that runoff and manage it as close to the source using low-impact development.
Groundwater recharge is important, and there's a lot of natural processes that filter that water as it goes underground and before it gets to our streams.
Rain barrels are a way to store that water and use it at your home for like a garden or irrigation.
Jenn: Right.
And then you can direct the runoff into the ground for filtration instead of letting it head straight to the river, picking up contaminants along the way.
Jacob: Yeah.
Jenn: So, I've heard it's illegal in some states.
Jacob: Yes.
In some states where they have a shortage of water, it can be illegal.
But here in Oklahoma it's definitely legal.
And there's over a thousand households in the Tulsa area that have rain barrels.
Jenn: Excellent.
Well, thanks for educating me about your area.
Jacob: Thank you.
Jenn: All right.
♪♪ Maggie: Hey, Jen.
Welcome to Tulsa.
Jenn: Thank you.
You must be Maggie.
Maggie: Yes.
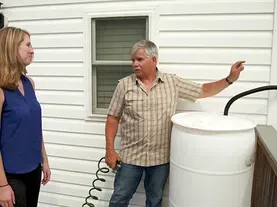
Jenn: Thanks for writing me in about the rain barrel.
Maggie: Nathan's out back checking it out.
Jenn: Okay, cool.
Maggie: I'm starting a vegetable garden this year, so I have... Jenn: That's so exciting.
Maggie: ...high hopes of capturing rainwater.
Jenn: That's going to be fantastic.
Hey, Nathan.
Nathan: How's it going?
Jenn: How are you doing?
Nathan: Good.
I'm checking out this beautiful white-oak barrel we got.
Jenn: That is like a reclaimed whiskey barrel.
It's beautiful.
Nathan: It's beautiful.
I mean, look at all the detail in here.
Nice, big iron hoops.
Nice, wide stave right here that we can add a spigot to.
It's just the right barrel for the job.
Picked up this nice, little kit.
It's really easy to install.
Comes with a diverter, comes with the fill hose.
We have a drain for the bottom, and then we have the spigot if you want to hook a hose up to it.
Really easy to install.
The only thing we don't have is we don't have a downspout right where we want it.
No problem.
I picked up the parts and pieces for that so we can install it.
First, we want to kind of look at how we're going to orientate this.
I kind of like this wide one right here if we're going to start drilling holes into it.
But we also need a nice, level platform.
Maybe build it up.
Jenn: Well, I brought some blocks, number one, to level it and, number two, to elevate it.
So, it's going to be easier to have water flow come out of the spigot.
And then I was thinking we could cut this grass out from here, maybe lift a couple of those pavers just to make a nice arc, and we could add a few plants to dress it up.
Nathan: Perfect.
Well, if you guys want to unload materials, I'll get started on this downspout, and we'll meet halfway.
Jenn: Perfect.
All right.
Nathan: All right.
After dry-fitting the downspout in place, I'm using a hacksaw and tin snips to cut the downspout to length.
♪♪ Next, I want to screw two elbows together to be attached to the downspout.
♪♪ Secure them in place using a hand riveter.
♪♪ Now it's time to cut the hole in the gutter to receive the downspout.
♪♪ Once a downspout is in place, I can secure it to the siding with these straps and screws.
♪♪ Maggie: Hey, Nathan.
Nathan: Hey, guys.
Maggie: Oh, this downspout looks great.
I'm excited about this location.
Nathan: We're all secure.
I think we're ready to start on the base?
Jenn: Yeah, so, we need to prep the area first.
So, I'd like to move the rain barrel out of the way, move a couple of these pavers, and then these are the blocks I brought.
Nathan: Perfect.
Jenn: So, we'll stack nine of them.
Nathan: Yep.
Give a little bit of air at the bottom to let it breathe, let it dry out.
Jenn: Exactly.
Nathan: What'd you get for flowers?
Jenn: Some catmint and some astilbe.
Nathan: I like it.
Jenn: Yep.
Nathan: All right.
You ready to move this?
Jenn: Yep.
Nathan: All right.
I'm gonna lay it down.
Jenn: You got that, captain?
Nathan: I got it.
Jenn: All right.
Just set those to the side.
Maggie: All right.
Jenn: We're just clearing out all this topsoil and grass, right?
So, we have room to set the concrete pavers.
And then we're going to put sand down as a base so it sets it in place.
Maggie: Okay.
Does sand do anything to help with the drainage of the area?
Jenn: Yep.
Sand will let the water run right through it.
So, what we're trying to do is get it level.
So, you're compacting it down right now so all the sand locks together.
But it's also going to help us set the big stones in on top so that it doesn't sink down.
Maggie: Ah.
Jenn: And you're tamping it in so there's no, like, air pockets or little divots in there.
Maggie: Okay.
Jenn: I think that's pretty good.
Then we'll get Nathan back in here with his level.
Nathan: Perfect.
Jenn: Perfect.
Nathan: Nice.
Jenn: All right.
So, next, the block... ♪♪ ♪♪ I mean, look at you.
Maggie: Perfect.
Jenn: All right, now we're ready for rain barrel.
Sweet!
Nathan: So, we're going to cut a hole for the fill hose, and we're going to cut a hole for the diverter.
♪♪ So, this is the diverter that came in your kit.
It's specifically made for 3-inch-by-4-inch downspouts.
And the way this works is we're going to pinch it and slide it in, and then it's going to expand and act like a gasket.
Water's going to run down inside the downspout.
It's going to catch inside this tray and funnel down.
It's going to get picked up inside the hose and head into your rain barrel.
And then once the rain barrel is full, that water will come up to this height, fill this tray, and then it'll overflow down your downspout and out to your lawn.
♪♪ ♪♪ Jenn: All right.
So, we overdug here, which you always do just in case to get it prepared.
But so, some of the sand and stone dust I want to take out and incorporate with the soil that we took out, and this is going to help with a little bit of drainage if there's overflow in the area.
Now, you want to take a couple shovelfuls of this and then put it across the front.
Next, let's lay out the plants.
Nathan: But right there I have a kickout.
So, this downspout's going to come out onto this splash pad here.
So, I want to save a little bit of room and try and get that water away from the house.
Jenn: That's okay.
We can tuck these right close to the barrel.
Maggie: Perfect timing with the rain filling up our barrel.
Jenn: Uh, well, you know, wouldn't be a rain-barrel install without some rain, so... Nathan: I think it's working.
Jenn: Actually a little high.
You know what you could do?
Sometimes there's just excess soil.
And what I like to do is just rip off the bottom because you don't... And then you just fan out these roots so they reach out into the soil and then... Yeah.
And then backfill.
All right.
So, the last step, we're just going to throw a little mulch down just to clean up the area a little bit.
Maggie: All right, the grand reveal.
Oh, my word.
It looks so good.
Jenn: I mean, look at that.
You couldn't ask for a better rain barrel.
It's so rustic and beautiful.
So, it's been raining all day.
So, this area is a little bit overwatered.
So, tomorrow or whenever it dries out, re-edge it, put some mulch down, and I think it'll just dress up the area perfectly.
Maggie: Okay.
Jenn: Okay?
Nathan: And when the seasons start changing, you're gonna want to winterize this.
So, they provide this plug.
So, you're going to pull the diverter out, same two screw holes.
You cap that off.
Maybe open up the bottom, roll it around a little bit, get any water so it doesn't expand.
And also seasonally, maybe spring, summer, and fall, you want to pull that out, clean it, make sure there's no leaves or sticks in there.
Make sure the water is nice and clean, but not too much to take care of.
Maggie: Okay, that seems doable.
Nathan: So, what do you think?
Do you think there's any water in there yet?
Maggie: I think we should check.
Jenn: I think you definitely should.
Nathan: I hope there is.
[ Chuckles ] There it is.
Jenn: Look at the flow.
Nathan: Perfect.
Jenn: That's amazing.
Maggie: Thank you guys so much for helping me today.
This is such a beautiful feature in our backyard, and I can't wait to use it to water all my plants.
Jenn: I'm looking forward to it.
You did really well.
Nathan: Awesome job.
Maggie: Thank you.
Jenn: Nathan.
Nailed it.
Nathan: Good job, good job.
♪♪ ♪♪ Mark: I'm on my way to a homeowner's house that is experiencing some drainage issues.
So, in construction, we consider water one of the most major problems, whether the type of construction is residential, commercial, or industrial.
Now, sometimes grades will change, gutters will get backed up, downspouts will get backed up, and that'll redirect the water.
But I love these questions because it's usually a simple fix.
We call it "water management."
♪♪ Jenny: Mark, thanks for coming by.
Mark: All right.
Well, thanks for having me out.
Jenny: So, this is my backyard and my patio right here.
So, when we moved in here, this was all dirt and moss.
So, we decided to lay some flagstone down.
But pretty soon afterward, we noticed that when it rains, like, water pools here.
Mark: Well, first off, I want to commend you on doing a great job.
I love the stones, the way you laid them out.
The leveling actually looks very good, as you say, except for this area.
So, the culprit is right in front of us, this downspout.
So, obviously, it's dumping water right onto this section of the patio.
And that's what's causing the depression.
I did notice that there's a break in the foundation right there.
Do you know what that is?
Jenny: Yeah.
So, we found plans for the garden from like, 1945, and that's when they put the retaining wall in, and I think they flattened this area.
And there used to be a bulkhead there to the basement.
Mark: Wow.
Okay.
So, perfect situation for water infiltration to happen.
You can actually see all this dirt pooling here that would indicate that.
We could use a splash block down here.
And that would divert the water this way.
But, as you can see, if we do it out to the middle here, we're going to end up going down the stairs.
And we don't want that to happen because water turns into ice during the winter.
But I think I have a solution.
That would be to remove this elbow, connect a pipe to it, dig a trench all the way down this line of rock you have right here, go into the back of this wall.
We'll drill a hole right through this wall.
That's going to provide what we call a weep hole.
So, we'll collect all the water here.
It'll hit that weep hole and go right outside on the other side of the wall.
We do that, I think we've managed the water and our problem is solved.
Jenny: Okay.
Mark: All right?
I'm going to go grab some digging tools right now, and we'll get going.
The first thing we're going to do is scrape all this rock back.
We're going to use an iron rake.
Then we're going to dig our trench.
Next, we're going to take out our drill and go through the stone wall.
That'll give us our weep hole.
And that's the position for the water to exit.
Jenny: You're through.
Mark: We got through?
All right.
Jenny: Mm-hmm.
Mark: Before laying the pipe, I want to test the weep hole and make sure it's draining properly.
Okay, Jenny, so the next step is going to be the filter paper.
And you want to center the paper right to the trench.
Right in the trench.
Now take the zip ties and wrap the filter paper around the pipe.
Jenny: And this just keeps it in place?
Mark: And it just keeps it in place, right.
So, now I want to take the collar, put it into the perforated pipe.
That's going to help us with the connection from the extension to the downspout, which we're going to do just like that.
Take a screw.
Now I'll take the downspout.
Push that back into place.
And now we're ready for gravel.
♪♪ Jenny: What about in the winter?
Will the water freeze in the pipe?
Mark: So, great question.
That's why we're using a lot of stone.
The water will filter through, but it filters through much easier with the bigger stone.
Pull that white stone forward.
♪♪ All right.
Now the decorative stone.
♪♪ ♪♪ Jenny: Mark, this looks great.
Mark: All right, Jenny, thanks.
So, it looks like we got everything back the way it was.
I am going to leave you with a little bit of homework only because I know you're capable of it.
But we have the water going the way we want it now, so it's not going to dump out to this area right here, which is where that depression was when we came this morning.
So, the homework is going to be for you just to pick up these few stones, level them off the way you did the rest of the patio, and you'll be good to go.
Jenny: All right.
Sounds good.
We can do that.
♪♪ Richard: Wow.
Heath: Compared to the 17.
Kevin: How are you?
Looks like I missed a memo or something.
What's going on?
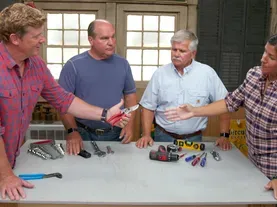
Richard: Well, we got talking about some of the new tools that we've been playing around with, and so we thought we'd share some of them with you.
Kevin: New stuff in the tool bag?
Lay it on me.
Richard: So, I always want to be able to see what I'm working on.
And I have to wear glasses.
And so I found this.
This is a face guard and dust mask that's got a little filter in it.
And you can wear glasses and it doesn't fog up.
And I think it looks unbelievable.
Kevin: It looks great.
It looks great.
Tom: I have a couple of those.
They are amazing.
Richard: They're unbelievable.
I didn't want to believe that it worked this good, but it really does.
Kevin: You're actually serious.
Looks like you fill it with oats and just eat out of it.
Richard: I do that once in a while.
On a long day.
Mark: All right, Kevin, you know, time to repoint either brick, block, stone, we always use our conventional tools, which is a trowel, a pointer, a margin trowel.
But right now I've gone into full bakery mode.
Kevin: Are you just going to fill that with mortar and you're just going to use it?
Mark: Just squeeze it, and you use it the same way, and it goes quicker than quick.
Kevin: You've used it in the past with me, and you seemed skeptical back then.
No more?
Mark: I was.
The speed is just too much to deny.
So, work that I can do in an hour, I'm doing in ten minutes, literally.
Richard: And you can write your name.
Mark: My name, "Marco."
Kevin: All right, Heath.
What do you got?
Heath: All right.
So, for me, I didn't think we'd really come across something new, but a new screwdriver.
One of my guys was using this, and I kind of gave him a hard time, saying, "Why would you bother?
We already have everything we need."
But I used it, and I can't give it up.
Kevin: How is it different?
Heath: So, it's actually a slotted screwdriver with the square drive in the middle.
And it's a little industry specific, but the devices come with both.
But when you use it, it doesn't slip at all.
Richard: It fits exactly?
Heath: It fits exactly.
Richard: I slip all the time, yeah.
Heath: Just bites perfectly.
So, the square drive can slip.
The slot can slip, the combination?
Nothing.
Tom: Yeah, the slot always falls off.
Heath: Always.
Tom: Yeah.
Heath: The other nice thing?
Comes off and fits in any quarter-drive screw gun.
So, you can put it in the gun and then go right back.
So, you're only carrying the one.
And the other thing is it has the on-board storage for the bits.
Tom: Oh, look at that.
Heath: So, it keeps everything.
They're all impact-rated, nice to use.
Kevin: Did you apologize to your guy?
Heath: I did not yet.
That's on the list.
Richard: Could I see that?
Kevin: The boss never has to apologize.
Heath: Oh, I should know better by now!
Mauro: There we go.
Kevin: All right, Mauro, what do you got?
Mauro: Well, Kevin, do you remember the old and good five-in-one that every painter has to have one?
Kevin: Absolutely.
Mauro: Thing of the past.
Kevin: Really?
Six-in-one?
Mauro: I have the 17-in-one.
Kevin: 17?
Tom: 17?
Mauro: I'm not kidding.
You heard it right.
17-in-1.
Kevin: How'd they go from 5 to 17?
Mauro: Technology.
[ Laughter ] Mark: All right, okay.
You should have thought of that.
Mauro: Right?
So I'll drive you guys through so you understand.
So, this very sharp edge right here, right?
If you have that stubborn hairline crack on your plaster, this will enlarge the plaster so you can do a better job plastering and patching, all right?
Now, over here you see this very sharp edge right there?
This works as a scraper.
Peeling paint scrapes right off.
Richard: Yeah.
Mauro: Now, we have another one right here.
See this little bevel edge right here?
That works as a spreader.
You can spread your compound.
You can spread your wood filler.
Regular roller cleaner right here.
And the small one is for the little baby rollers, the mini ones.
Kevin: Oh, yeah.
Mauro: We got two different sizes of wrenches here, 11/16 and 3/4.
Tom: Okay.
Mauro: And over here, if you need to pull some nail out, right there.
You can adjust for the size.
You get the size.
You got little, tiny nails and got medium or large.
All right?
But a little more thing to do...
When you open this up, right here is your nail set.
Kevin: Oh!
Mauro: Just going to need to use a little hammer to set.
Kevin: Nice.
Mauro: And a couple more things.
We got two different sizes of flathead and two different sizes of a Phillips head.
Tom: Perfect.
Mauro: That can help you out.
But I got another one.
Don't go yet.
Richard: Wait.
There's more.
Wait.
There's more.
Mauro: We're not done.
End of the day, summertime, 100 degrees, job is done.
You want to have something cold to drink, but you don't have, like, a bottle opener.
Kevin: No.
Mauro: Right there.
Richard: Do now!
Mauro: Right here.
Tom: That's what you need.
Mauro: Drink.
One.
done.
17-in-1.
Mark: Wow.
Kevin: Use number 17 last.
Don't start with the bottle opener.
Everything else will work just fine.
Tom: This one's worn out pretty good.
Mauro: This is my baby.
Old, very old one.
Kevin: All right, sounds good.
Tommy, what do you got?
Let me guess.
Tom: What do you think?
What am I wearing?
Kevin: A new blue shirt?
Richard: Yeah!
Mauro: New glasses.
Tom: I actually found this about a year, year and a half ago, working on the lathe every night.
Basically, this protects you -- table-saw kickbacks or lathe work.
Keeps me a lot cleaner.
I can store all my tools that I need when I'm on the lathe.
Also, when I'm turning, you always get sawdust flying.
I can flip this up, lock it in across my neck.
It stops the sawdust from falling in.
Kevin: Very nice.
Let's not forget the most important.
Tom: What's that?
Kevin: How sexy it makes you look.
Richard: Hubba hubba!
[ Laughter ] Hubba hubba!
Tom: It's very thinning.
Mark: Thinning.
Richard: Slimming.
Kevin: Well, not so much.
All right.
Good to know.
A list for me and for everyone else.
And that's it for us this time.
But we got a lot more coming up next week.
So, until then, and for all of us, I'm Kevin O'Connor for "Ask This Old House."
Rich, let me see that screwdriver.
Kevin: Next time on "Ask This Old House"... Jenn helps a couple update the landscaping in their front yard after they cut down a few trees and ended up with a whole new shade pattern.
Plus, Richard shares his love of teaching plumbing, heating, and cooling and where his inspiration comes from.
Then he shows me the new facility that he built to test and teach modern HVAC equipment.
All that on "Ask This Old House."