Danish Pastry Pockets with Beatrice Ojakangas
Season 2 Episode 2 | 24m 6s | Video has closed captioning.
Chef Beatrice makes a variety of Danish pastry pockets, including twisted, jam filled, and sugar topped.
Aired: 06/26/92
Season 2 Episode 2 | 24m 6s | Video has closed captioning.
Chef Beatrice makes a variety of Danish pastry pockets, including twisted, jam filled, and sugar topped.
Aired: 06/26/92
Boom!
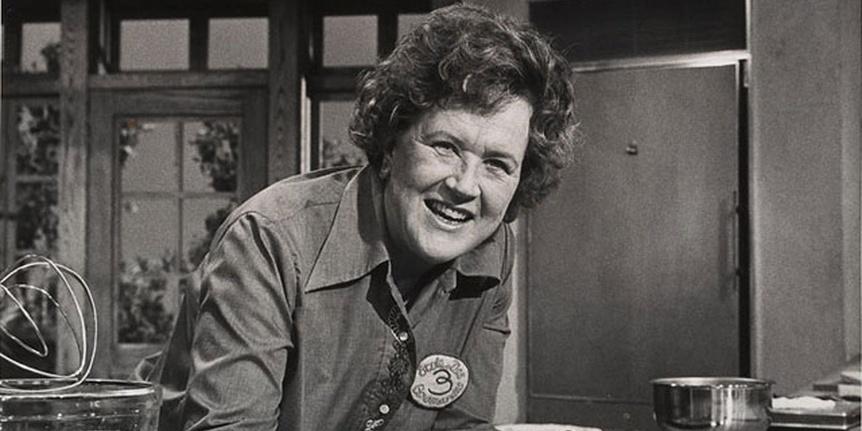
Hello, I'm Julia Child.
Welcome to my house.
What fun we're going to have
baking all kinds of incredible cakes, pies and breads
right here in my own kitchen.
Beatrice Ojakangas, a Scandinavian cookbook author
from Minnesota, teaches us how to make real Danish pastries
not only plain, but twisted, jam-filled or sugar-topped.
Learn how on...
[Captioning sponsored by VIEWERS LIKE YOU]
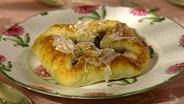
Here is a platter of homemade Danish pastry--
a beautiful braid and these packets
with a fruit filling, and this lovely dough
that's just tender and buttery.
And Beatrice Ojakangas is going to show us
how to make it--
starting with the dough, I guess.
We're starting with the dough, right.
What we have is a quarter of a cup of warm water
and we have one package of active dry yeast.
So we're making this liquid mixture
because first we want to dissolve the yeast in the warm water.
Then we're going to add a half a cup of milk.
Is this low-fat or just milk?
You can use anything.
Well, another thing that's in the liquid
is an egg.
One U.S. large egg.
One U.S. large egg.
And we're going to crack it
just to check to see that it's okay
and there's no spots or funny pieces in there.
Okay, we'll whisk this up.
And that's our liquid ingredients.
We'll just let that sit.
Now, the second half of it
I'm going to measure 2½½ cups of flour.
Dip the flour in, fill the cup heaping full
and then level it off with a straight edge.
Then you always know that it's pretty accurate.
It's always accurate-- you have to be sure.
So we want to have it be even up to the top.
And half a cup.
2½½ cups, right.
And that goes in here.
Forgot to add something to our liquids
and that's going to be a quarter of cup of sugar.
A quarter of a cup of sugar.
That goes in.
And a teaspoon of salt, which is over here.
I'll measure that.
That's nice, using the...
Chopstick?
I love to use a chopstick
because it's so handy.
Okay, and then we're going to take our two sticks of butter--
and this is unsalted butter.
Cold and chilled.
Cold and chilled-- it should be pretty stiff
because we're going to actually cut it into the flour
so that it stays in its own pieces.
We're not making cookie dough, we're making a pastry.
Then we'll just put these into the food processor
and put the cover on.
And now what we want to do is pulse it.
It's called "breaking it up."
We're just breaking it up.
And we'll see how big the pieces are
after eight times.
Five...
Five, yeah.
Six...
Seven...
Eight.
Now I'll take a look.
I always have to hit it.
Okay, now let's check that.
We can see now
that at the pieces are pretty big.
Yeah, this is to make a flaky dough.
This is to make a flaky dough.
You want to be sure that the butter is cold
and that it stays in pieces big enough
so that when you roll out the dough
there's a little flat...
Mm-hmm.
Little flat pieces.
Like automatic puff pastry.
Automatic puff pastry is what it is, sure.
Okay, now we just take our rubber scraper
and just gently fold it into the liquid ingredients
just until the flour is moistened.
Now, this makes just like a rough dough
and this is how it looks.
All the liquid has been absorbed.
The liquid has been absorbed.
Now we'll just cover this with plastic
or if you have a great big plastic bag
you could slip it into the plastic bag.
And it goes into the refrigerator
at least overnight.
And that will give it time
to sort of stabilize and even out.
Fine.
And here we have the dough
after it has sat in the refrigerator--
or chilled-- for 24 hours.
And it is chilled
but it doesn't look like it's done much.
No, it doesn't.
It looks pretty much like it did.
And we're going to scrape it loose from the bowl.
And then, to make it easier to handle
we're going to dust it with flour.
Look at that, that flour shaker--
I've never seen anything like that.
Oh, it's my favorite; I couldn't bake without it.
And then we'll just turn this out onto the board.
So now we have our rough dough, and what I've done
is I've just dusted it with flour on both sides.
I can see the pieces of butter in there.
Yes, you sure can.
And once I start rolling it out
you will be able to see the butter even more.
Roll the dough.
And what this rolling is going to do...
First of all, I kind of call this
"taming the dough"
because it's really a rough dough.
You're going to have to make it do
what you want it to do.
And right now it's a little bit uneven--
see, it's dry here, a little sticky there.
So now I'm just going to tame this
into a foldable dough.
Slap it a little bit, have some fun with it.
Get it loose from here.
Dust the bottom.
Dust the other side.
Dust the top.
It's just like making a puff pastry
except you have yeast in it, isn't it?
Yeah.
Okay, but see now, pretty soon
it begins to actually look like it's...
Like a dough.
Like a dough-- isn't that amazing?
Okay, we have...
That's wonderful.
folded that over one time.
Now we're going to take this half
and fold it over...
and this half, and fold it to the center.
When we're rolling out dough
what I do, always
is roll from the center outward...
Center back.
Center outward...
center back.
That makes an even...
So that it's real even.
I'm trying as much as I can
to keep it as square as I can.
Mm-hmm.
And I'm going to give it
just one more folding over.
At this point, I'll just go ahead
and cut it in half before I...
before I put it in the refrigerator.
Could you freeze it at this point?
You could freeze it at this point also.
So, we'll rewrap the dough
or else put it into a plastic bag
and put that into the refrigerator.
How long does it rest now?
30 minutes is all you really need...
Because you've activated the ...
We've activated it.
And the yeast is going to start working again.
It's amazing how it just starts...
Right away.
Right way, yeah.
All right, next we're going to make the apricot filling
that goes into one of our pastries.
And to do that we start out with a cup of sugar.
Now, I'm just going to pack a cupful of apricots here--
add that to the sugar.
And we're going to add one cup of water.
And then we'll just stir that...
up a little bit, like this
so we don't end up with the sugar all on the bottom.
So, it goes into the oven-- microwave oven.
And...
ten minutes.
You should stir it two or three times
while it's cooking.
Why is that?
Just to pick the sugar up from the bottom
so that it doesn't cake down there.
And we'll start it again.
And here we have our apricots.
We'll put them into the food processor now.
Okay, and...
That's a real purée, isn't it?
There we are.
If you didn't have the microwave
you'd have to simmer them
for several hours, wouldn't you?
And you'd have to be really careful
to stir them so that they don't burn--
especially with something
that has as much sugar in it as this does.
Okay, then we're going to get two tablespoons of...
Fresh lemon.
Fresh lemon.
I'm doing it into a cup
because there are some seeds here.
And we'll want to measure off two tablespoons
because that's about what it'll take.
We have a strainer.
There's a cup.
There we go.
And now we'll measure two tablespoons...
And about a half a teaspoon of almond extract.
Mmm, you can smell that almond extract.
We'll stir this up
and that's ready to use in the filling.
Well, now our apricot filling is finished
and we'll just put it into a little jar
which can go into the refrigerator
and you can use it for toast or whatever.
What does that make, about?
Makes a little more than a cup--
about a cup and a third or so.
The prune filling is done exactly the same way
only we add cinnamon and vanilla to it.
Okay, we're going to make our confectioners' cream.
This is not a third filling
but it's a filling that we add
into the pastry along with a fruit filling
because it kind of mellows off the flavor.
And we measure out one cup of cream--
half-and-half
or if you can afford the whipping-cream calories
it's even better.
And then we're going to measure
a tablespoon and a half of corn starch into it.
If you have a half tablespoon measure
that works really well.
but I'm going to have to kind of to make...
You're going to eyeball it.
Eyeball it, right here.
And we'll level it off and put that in.
And then we're going to measure in
Two tablespoons of sugar.
You can add an extra third tablespoon
if you like the extra sweetness in there.
And so it's two to three tablespoons.
We'll whisk that a little bit here
so that you get the corn starch up from the bottom.
It tends to want to sink to the bottom.
Then it will just make a little cake down there.
Now, this goes into the microwave.
This goes in for a minute.
Actually, I'd like to do it a minute at a time.
There we go.
And after each minute, I take it out
and stir it and then put it back in.
In the meantime
we can the egg yolk and the vanilla ready.
One teaspoon of vanilla.
And one egg yolk.
Pure vanilla extract.
Pure vanilla.
Not the fake stuff.
Nope, the fake stuff just doesn't taste right.
Okay, we'll take this and we'll... give it a stir.
It hasn't come to a boil yet.
But I just stir it just to be sure
that cornstarch isn't stuck to the bottom.
Mm-hmm.
After the second minute
it's begun to thicken up a little bit
but it hasn't thickened enough.
So I'm going to put it in for another minute
and it will come to a definite boil.
It has boiled up, hasn't it?
It has boiled way up
and that's okay to do when it's just cornstarch.
You wouldn't want to let it boil
way up like that with the egg in there.
See how thick it is.
That really is thick, isn't it?
That's how you want it.
Now we're going to add a little bit of that
to the egg yolk mixed with vanilla.
So you won't shock the yolk
when it comes into the hot stuff.
We don't want to make scrambled eggs here.
I'm going to do this with a scraper
because we want to get it all.
When you're dealing with small amounts
you can't afford to lose too much.
Okay, and then we'll just stir that in.
And the pastry cream at this point
is probably hot enough to cook the egg yolk
but just to be sure
we'll put it back in the microwave
for another 30 seconds.
We're not taking chances with egg yolks.
We're not taking chances with salmonella.
Back in, 30 seconds.
And there's our pastry cream.
Well, that looks beautiful...
And as it... it's very thick; and then as it cools
it gets even thicker, but it's almost...
reminds me of lemon curd.
Lovely and smooth, too, isn't it?
Mm-hmm.
Mmm... it's good.
Very hot.
Good, good.
And now we're going to fill some pastries.
Great.
All set to go?
Ready to go, here's the dough.
The dough's ready for rolling out.
You can see the layers there, can't you?
You certainly can.
Okay, I'm going to dust the dough with flour
just to get everything nice and dry.
And we're going to roll this out to do the shaping.
And we're going to roll it out
into a 10 x 20 rectangle.
And, I don't know what it is, I get so excited I think
I should do this really fast but we don't need to do it that fast
and the dough actually performs better
if you don't try to rush it.
But if you roll it out slowly...
it comes out very even.
We're going to go a little bit further here
because what we want to do is get five-inch squares.
So in order to have five-inch squares
it's got to be ten inches across.
Okay, now, you can be very precise...
Let's be very precise.
Okay, well, we'll...
Do it the right way.
There we go-- 20 inches.
Now we're going to cut it in half
at the five-inch mark.
Then we'll just draw a straight line...
just like a carpenter.
You know, carpenters say you should
measure twice and cut once.
That's what my husband always used to say.
Is that right?
Yeah.
Now comes the fun part.
Yeah.
We're going to fill and shape the pastries
with our prune filling...
with our apricot filling...
and the pastry cream.
This will be nice.
That's not... of course, a bare tablespoon, then?
If you're using a teaspoon it's about a rounded teaspoon.
I like to be a little bit generous
with the filling so that we have...
so it's juicy-- I like juicy rolls.
Yes, yeah.
Next thing I'll do is paint the edges.
That's just beaten egg white?
Just with beaten egg white.
So go all the way around the edges here
because it acts as a kind of a glue
when we start shaping the pastries here.
Now, the first one that I'm going to shape is a little packet.
You pick up the corners like that--
and if you just pull the corners over
they'll... they flop open while they're baking--
but I pick them up and just kind of pinch them together
and make a little top hat there, see?
And I give it a little twist like that.
Mm-hmm, just to hold it together.
To hold it together, but you get that nice little...
That's that parchment paper here.
And that's parchment paper on the...
I always use parchment paper.
Let's take this one and make
what the Danes call the tre-hjorne... the three-corner.
Oh, the three- corner, oh.
And we just seal the edges here with your finger.
And that's how the three-corner is made.
I mean, that's not...
Very simple.
Very, very simple.
You can decorate it with a piece of dough
if you wanted, I guess.
Yeah, we have a little...
a few little scraps here.
We can brush the top and be fancy.
We should really glue it down with egg white.
Now, one of the favorite things I do with prune filling
is at Christmastime I make prune tarts.
And that's a Finnish specialty.
It isn't Christmas without prune tarts.
And the way that those go is like this:
you cut the corner to the center...
Mm-hmm.
Then you lift up the center...
Lift up every other center.
Every other one.
And there we go: we've got a nice little star.
Well, that's nice, that is nice.
There's one that we didn't do yet
that's very simple, and that is to make
the spandaur-- is what they call it--
Mm-hmm.
Kind of looks just like that.
It's just like wrapping a baby in a blanket
without pulling one end up.
Julia: That's very nice.
There we are.
All set.
And then they sit for about 30 minutes.
We let them rise, and before we put them into the oven
we're going to brush them with more egg white.
And we have some here that we did a little bit earlier.
And we'll sprinkle it with pearl sugar.
Julia: Well, I don't think
I've ever seen that, that's...
That is a sugar that's used all over in Scandinavia
and in Minnesota we can find it in the supermarket.
But other people may have to look
in the Scandinavian specialty stores
or into Scandinavian mail-order catalogs.
Aha.
Beatrice: Okay, now these go into a 400-degree oven
and they'll bake for about ten minutes.
Good.
Julia: Oh, they look lovely.
Beatrice: They're all done.
We'll transfer them onto the tray here.
Well, that's a good idea, just slide them on.
We could actually very easily
slide them off onto the rack now, too
so they don't...
Then they'll really cool nicely.
They'll cool nicely and we won't have any...
Do you eat them warm or cold or what?
Oh... that's the best way!
Warm.
Warm.
Yeah.
Okay, well, now we're going
to make our frosting.
We're going to add two or three teaspoons
of milk to a half a cup of powdered sugar.
And it can be kind of a thin glaze.
We had to sift the powdered sugar
because it had some little lumps in it.
Oh, yeah, you always do.
I always do.
And then I'm putting it into a plastic bag.
I'm going to close it up.
Oh, that's in a zipper-lock, that's a wonderful...
Yeah.
And then cut a little bit of the corner off.
Yeah.
And then we'll just drizzle.
Oh, well, that's very clever.
It's kind of a royal icing, isn't it?
A royal icing made with milk
so it's not going to be as stiff
as a royal icing would be.
Well, that's nice, isn't it?
Nice little glaze over the top and they're all set...
That's, that's beautiful.
...for eating.
Beatrice: Okay, here we have three different kinds of berries:
beautiful raspberries, blackberries and blueberries
that we're going to crush down
to make about two cups of crushed berries.
Get them coarsely crushed because the rest of them...
of the mashing will happen as it cooks.
So we're going to add a cupful of sugar to this.
And we'll mix the sugar in...
Well, the sugar draws out the juices, too, doesn't it?
It does, you don't need to add any extra water.
Okay, now these are ready for the microwave
and they'll cook for 18 minutes.
We'll stir them two or three times in the middle.
But I've already programmed this for 18 minutes.
Okay, here it is, it's all cooked and cooled
and we added a tablespoon of lemon juice to it.
That's, that's thickened up, too, hasn't it?
Yeah, one thing you have to be sure to do
is to cook it without a cover on it in the microwave
because you want that... all the moisture and the liquid to evaporate.
It makes a lovely jam.
Fresh tasting.
Mm-hmm.
Okay, well, we'll roll out our dough now.
Now we have the second half of our pastry
remember we made our packets out of the first half
And you have your cold...
And sometimes when the dough is really cold
it's hard to start rolling, so I either
pound it with my fist or I'll pound it with the... rolling pin.
Is this again go... 20 by... ?
No, this one goes 16 x 10.
16 x 10.
Very fine.
Very fine-- now we're going to take
our parchment paper and put it underneath.
This makes it a lot easier to transfer the filled braid...
That gets to be awfully difficult otherwise.
Now, um, the next thing I'll do is cut strips
along each edge.
About three-quarters of an inch or an inch apart.
About a third of the way into the dough.
Now the next thing we'll do is take our lovely jam...
Here you are.
Bottled jam never tastes like this, does it?
Never tastes the same, does it?
And we'll just spread it right down the middle
because we're filling this braid with this jam.
Well, it doesn't look at all like a braid.
I'll be very interested to see your movements from now on.
How this braid happens.
Yeah.
And then, one thing I needed to do is...
brush the edges with...
That's your same beaten egg white.
Mm-hmm, beaten egg white.
That same nice pastry cream.
The pastry cream, we just spoon that right over the top.
And that's just like having berries and cream
inside a Danish or a flaky pastry.
So it's almost like a pie.
Mm-hmm.
Now... what the next thing we're going to do
is turn this into a braid.
And we'll do it just the way you braid.
You pull the left side over the top like that.
Oh.
There we go.
That's nice, isn't it?
Makes a nice little braid.
Kind of looks like lacing up a moccasin, doesn't it?
Yes.
Okay.
Now we'll brush this with some egg white.
And now we'll transfer this onto the baking sheet
so if you want to put the baking sheet here.
Just move this over.
Sprinkle the top with some of our pearl sugar again.
Now, this has to rise for about 30 minutes
and then it goes into the oven to bake.
Do you want a cover on it?
We'll put a cover on it.
There we are.
Here it is.
Look at that.
All baked.
It's swelled... swelled up nicely, hasn't it?
And then we'll just slide it right off the cookie sheet.
See that... wonderful having that paper, isn't it?
The paper makes it so handy.
Then we have a glaze to put on top of the... just to decorate.
Is that the same glaze we had?
It's not, it's almost the same
except instead of cream we use coffee.
Ah.
With... with the powdered sugar.
That'll show up more, too, won't it?
Well, and, you know, coffee
is such an appropriate flavor here.
Mm-- oh, now that looks very nice.
It doesn't take a whole lot
just enough to give it a shininess.
So there.
It's wonderful what you've taught us today, Beatrice.
This wonderful braid
and then all these cute little pastries.
They're so good to eat.
Well, thank you, I love them myself.
Well, it was just so dear of you
to come all the way from Minnesota.
Any day.
Any day.
And we thank you... very much.
Thanks for having me.
Julia's got the tastieation]
Julia: Bon appétit!
Celebrate Julia Child
Get recipes, watch hundreds of episodes of her classic shows, read tributes from celebrity chefs, and more. Bon appetit!
Explore Now