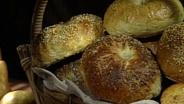
Bagels with Lauren Groveman
Season 1 Episode 8 | 24m 6s | Video has closed captioning.
Chef Lauren Groveman shows how to make soft, chewy bagels that are better than store bought.
Aired: 06/26/92
Season 1 Episode 8 | 24m 6s | Video has closed captioning.
Chef Lauren Groveman shows how to make soft, chewy bagels that are better than store bought.
Aired: 06/26/92
♪♪♪ Boom!
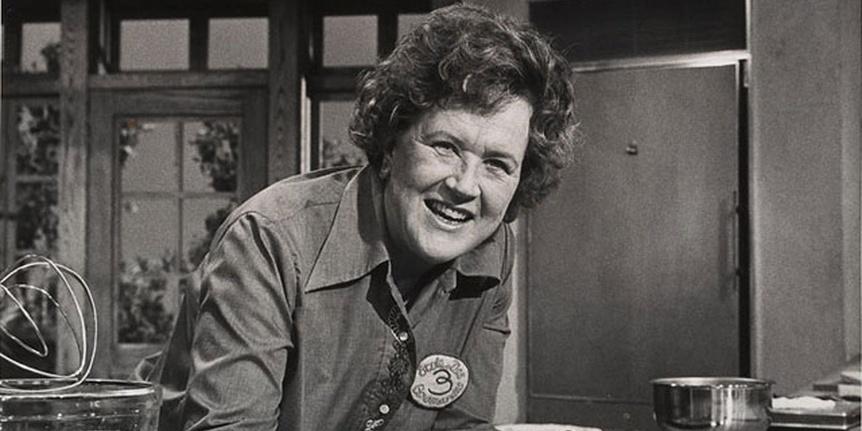
Hello, I'm Julia Child.
Welcome to my house.
What fun we're going to have baking all kinds of incredible cakes, pies and breads right here in my own kitchen.
Are you fed up with stale, tough, dry bagels?
Let New York's Lauren Groveman show you how to make and bake the best and freshest bagels you've ever dreamed of eating.
And you can do them ri ght in your own home kitchen.
Join us, on... [Captioning sponsored by VIEWERS LIKE YOU] Look at this beautiful bagel.
It's warm-- it was just baked this morning.
And look at that, inside there.
It's just absolutely delicious.
It's softly chewy and Lauren Groveman is going to show us how to turn our kitchens into a bagel factory.
That's right, and the best thing about this recipe is that it teaches you how to have fresh bagels first thing in the morning which is... Great, every day.
Okay, let's as semble our dough.
The first thing I' m going to do is dissolve my on e packet of yeast in one-quarter cup of nice, you know, wa rm water.
You don't need a thermometer or anything.
If it's too hot...
It kills the yeast, bu t you don't ne ed a thermometer.
I'm giving it a pinch of sugar which is yeast's fa vorite food.
Okay, so I'm going to let that get nice an d happy over there.
Now I need my mixing bowl.
And here I have tw o cups of, ag ain, warm water.
Any kind of liquid th at you put into a yeast dough needs to be about the same temperature...
Body temperature.
Yeah, nice and happy li ke you want to swim in it.
Yep .
I'm going to put th ree tablespoons of vegetable shortening which helps to give my bagels, th e texture, a nice bounce.
That was why we had such a lovely, softly chewy...
I'm glad you loved them; th at makes me happy.
Sometimes, I don't like bagels, but I just adore these.
Okay, I'm going to put in to this bowl right now just one tablespoon of salt and I need one ta blespoon of sugar.
That's again for the yeast?
Yep, and flavor and coloring, he lping it brown.
Now I'm going to use on e tablespoon of li quid barley malt which is... it 's very nutritious.
I've never heard of that.
Is it, if you don't have it, can you leave it out?
You can, you'd use tw o tablespoons of sugar but it's in he alth food stores.
It's very healthy.
It's from ge rminated barley.
And it also helps to give the dough a nice, um, chewy texture.
Okay, so now, I' m just going to st ir that up here to get it al l mushed up.
The yeast isn't qu ite ready yet.
It's not... it 's not happy yet.
It's getting happy.
I'm going to add some fr eshly ground black pepper.
Oh, in the, in the dough?
That's interesting.
But you don't have to, yo u can leave it out, it 's up to you.
If you put it in, then it should be in.
You're the boss.
Okay, now... it's pretty ha ppy, it's pretty creamy.
It's going to go ri ght in there.
Now, I'm stirring in flour, on e cup at a time.
Actually, you know so mething, Julia I'm putting th e flour over here.
It's more co mfortable for me.
When it's totally liquid, yo u can stir in two cups at a time You don't have to be precise about measuring it.
No, no, no, no, yo ur hands... first of all the dough will take a different amount of flour every time you make it depending on weather conditions, on the flour the amount of moisture in your flour.
What I'm doing here is I'm creating a glutinous network.
This is super gluten flour, which is bromated which means it's treated with potassium bromate so it gives the dough a tougher texture-- more bagel-like-- an d it's very tasty.
More bagels... More bagel-like.
Okay, so it's not just like, you now, bread, like white bread.
Okay, now what I'm doing here is I'm just going to stir this.
I'm creating a real el astic texture here.
And once this dough le aves the sides of the bowl I get it out.
I never put my hand in to my canister.
I always work from a scoop, just like that.
Now, it's almost ready to get turned out.
Now, I make a nice, fl our bed and... Do you ever use a machine?
Nope.
But you could, I suppose?
Sure you could, but...
But you like it by hand.
I do.
You know something?
It 's a sport to me.
When I do it by hand, it feels more like a sport.
My whole body's involved.
I feel like I get a workout.
It's good exercise.
Yeah, so I can eat more.
Right?
Eat more bagels.
Right, okay, let's get... Now, just going to scrape off my spoon and we're going to knead this dough.
Okay?
Okay.
I'm right handed, th is is my best buddy du ring this... because now the dough is very sticky.
Okay, so in order fo r the dough not to stick to me I have to use... my scraper.
That has a lovely, soft texture, doesn't it?
Oh, it's wonderful.
But you see, on ce it gets sticky you just use yo ur pastry scraper lift it up, flour yo ur surface and go.
To flour your hands you don't flour your hands over the dough but to the side of the dough.
That's... that really is a beautiful way... and as soon as you hold on to it, it's sticky, yeah.
It's sticky now, bu t it won't... Lovely quality.
It won't be-- I'm going to make this nice an d glutinous.
Now, I'm just going to do this for a li ttle while until it becomes ni ce and smooth an d elastic.
I'd like to give it a little... Go for it.
It's just sort of rough, and I can feel it then.
Yes, I see.
That has a lovely feel to it.
It's like a baby.
Thank you.
Oh, any time, my pleasure.
( laughing ) I'm going to show you ho w you can how you check the texture be cause that's very important.
And every yeast dough th at you make will check slightly di fferently depending on the interior.
This dough is actually ve ry easy to check be cause it's so elastic.
There's nothing to get in th e way of building texture.
Okay, see when I push an d I let go?
That's the development of elasticity.
Okay, that means it's ready, I go like this and it fills up.
I push it and it comes back.
It's ready.
You see that?
Now, now I'm going to knead it just one more second and, Julia, if you wo uld just butter that rising bo wl over there.
Okay.
The stainless steel on e, thanks.
Not that it has to be stainless steel.
What we need here is a bowl that will al low this dough to at least double in bulk.
Now, we're going to rise the dough when we do this for anywhere from an hour to 2½ hours depending on how light-textured yo u want your bagel to be.
But then it ge ts refrigerated.
Kerplunk.
You want to butter the top?
And put some butter on-- fine.
And the reason fo r the butter is just because it tastes so good.
Also, I guess it prevents things from sticking.
Yes.
Now, we're also going to grease the little bit of the wrap.
And that's just in ca se the wrap should touch we know that it won't tear wh en we have to uncover it to go and punch our dough down and then to refrigerate it an d then to shape it.
I'm going to put a towel ov er my bowl.
Keeping it warm.
Keeping it nice and snug as a bug in a rug and I want to tell, yo u know... things go on in your kitchen you don't know wh at time it is.
This is, I want a one-hour rise, so I'm going to time this-- "Bagels punch down" and I'm going to put this ta g right on top of my bowl so that no matter what my kids do and get me all upset I can remember to punch my dough down.
And that's after about an hour?
I'm going to show you wh at this dough looks like.
Remember how small it was?
Yes, yes.
It sticks a little bit.
The whole point of not sticking is so that you don't, yo u know, tear texture that you've very ca refully built, okay?
So, now I want you to give that li ttle, give it a one-two.
Boom!
Like that?
Like that.
Still very soft.
Yes, it's very soft and can...
I'm going to di vide this dough.
This dough ma kes ten large bagels.
So, if I have a family of five, and I want to eat fresh bagels I can divide the dough ri ght now, separately and I can put on e half into... can I have on e of those bowls?
That one's already buttered.
Right, one greased bowl and the other one's go ing to go into another gr eased bowl just like that and they're going to get covered and refrigerated for up to four hours or ov ernight, or up to two days.
Can you freeze the dough?
You can, but, I... personally do n't really like to especially not for more th an two weeks because then the yeast becomes little alcoholish and it affects flavor.
So, this way, we can ha ve fresh bagels to morrow morning and the next day, or the next day, okay?
That's all right with me.
These are going to sleep no w in the refrigerator.
Fine.
We're ready to make bagels.
Now, before we make bagels there's certain things th at have to take place.
You have to have a pot of water boiling because we boil bagels be fore we bake them.
Here we are, boiling water.
Yes, so we have bo iling water and the oven is pr eheated to 500 degrees for at least 30 minutes and they're... they're li ned with quarry tiles to get a nice crisp crust.
In other words, get ready before you do it.
Thank you.
Okay, now, this is for five bagels.
And that's still very soft.
Nice and soft.
I'm going to divide th is into five.
And they won't be all perfectly even.
But they're homemade.
You know?
Okay, now when you want...
The dough has a lovely yeasty smell to it.
I love this.
Okay, I'm going to cover th em while we work with them just so that they do n't develop a skin.
Now, I'm going to give yo u a piece, too because I want you to work.
Now, it's a little on the sticky side so you want to use the flour, okay?
Now, this is what I want you to do.
We're going to just pinch.
What I'm doing here is I'm pulling on al l that elastic...
It's very much like forming little rolls, isn't it?
Absolutely-- now yo u make it nice and pi nched on one end.
It's nice and smooth on the other.
It's absolutely like... th is is the way I do my French rolls.
Now I want to do is I flour the bottom an d I turn it pinched side down an d I flatten it a little bit, okay?
Take my finger, go right through.
Till we feel it on the other side.
Yes, now, this is th e important part.
We want to make the hole di sproportionately large so it looks silly-- it looks like a silly- lo oking bagel.
And the reason fo r that-- and you have to use your flour; don't be afraid to flour-- because if it's too ap propriate looking, what happens is... the bands of elasticity this is so elastic, that th e hole will close up.
Look how silly th at looks?
You see?
You'd never think that was going to turn into a bagel.
Oh, actually, le t's flour our towel.
Is this one all right?
That's beautiful.
You just put it down, ju st like that.
And it looks silly, bu t what happens is...
It's already shrinking in, isn't it?
Right, so here... th ere's another one.
So, because otherwise, wh at will happen is, if you don't do it you'll end up having cu te little buns wi th no holes.
They'll be delicious bu t they won't be a bagel.
Now, what do you have here?
This is my egg white gl aze which will allow a nice, shiny finish to my bagels and will act like glue fo r my seeds.
Now, why do you strain it?
It removes the gelatinous, cl umsy quality of egg white makes it easier to apply wi th a pastry brush.
Okay, now we're going to go boil these bagels, okay.
Now, before I do we're going to make th e water a little sweet which is good for browning.
Oh.
And I'm going to add a pinch of baking soda... Quarter cup of... Yeah, quarter of a cup.
I'm going to add I'd say about a teaspoon of baking soda also helps with browning.
Now, I'm just going to lower these bagels in.
Now, you want a wide pot as opposed to a tall, na rrow one because these need to sit freely in the water.
If this was a great big pot, yo u could put more in but this is, see it goes down an d then it comes up.
I'm going to use a skimmer.
And you let this...
They look awfully funny, kind of wrinkled.
They are funny, do n't they look funny?
They should be re ally rapidly boiling and we're going to leave them this way for a minute and a half.
Meanwhile, while these are boiling let's just take ca re of our peel.
Actually, I fl avor my peel-- I mean, flavor th e bottom of my bagel.
Because I don't li ke that the bottoms don't have an ything on them.
So, I have... th is is medium- br own cornmeal.
These are just, yo u know, nice ra w sesame seeds.
Well, that's a good idea because they're going to sit on there.
Yeah, and I put so me poppy seeds.
Poppy seeds, that's a good idea.
And some caraway seeds.
Now, you can us e all of these you can use no ne of them but you must ha ve the cornmeal.
Otherwise your ba gels will stick and you'll be very sad.
Turning them over.
Turning them over.
Now they need about another... About a minute, mi nute and a half.
Okay... so we're going to get these out.
And we're going to top them-- actually, if you would like to just brush those with a glaze.
It helps to give them a nice shiny finish.
And then we're going to top them.
Was it about two minutes be fore you took them... before they swelled up?
Uh-huh.
I guess you just boil them until they really swell do uble like this.
Right, they sink and then they float and then they get nice and puffy.
And then they puff.
Like a dumpling.
Yes.
Yeah, all right.
Just going to glaze that and then we're going to top them.
All right.
Let's leave, let's say, two of them plain.
All right.
And so we'll give you some sesame and I'll do poppy and you do sesame.
And then let's do a "flavor all" where we taste everything in every bite.
Okay, well, th ere's one sesame.
Okay, and then we'll do that one a "flavor all" and those two we'll leave plain.
All right.
Lauren: So , we're ready to rock and roll.
Now, I want steam in my oven.
So I have a quarter of a cup of ice water that I'm going to throw un derneath the tiles.
Under the tile?
Can you just op en the oven for me...
There are those tiles, red hot.
That's right, now we 're going to go under the tiles here, no t on top of them.
There they go.
Close the door.
Now, that's at 500 degrees.
We're going to re duce the temperature to 450 and bake fo r 25 minutes.
Okay.
So now that the bagels ha ve baked for 25 minutes and they're nice an d golden brown I've let them sit in the turned-off oven fo r five minutes.
Now I'm going to op en the door and let them sit five more minutes with the oven tu rned off, yeah.
They look lovely.
They're ready.
Aren't they gorgeous?
I've never have seen bagels th at have puffed this much.
They're chubby.
Obviously I've ne ver eaten real ba gels before.
That's the love in them, Julia.
Beautiful, I th ink it must be.
Now you don't want to eat these right away because when something comes from the oven you really have to look at the cooling process as part of the cooking process.
Because hot dough is not good for your tummy.
How long should they wait?
I'd say at least 20 minutes.
Then we're ready to eat them.
Yeah, go for it.
So here are my beautiful bagels.
And they are absolutely beautiful.
Yeah, but you need to pu t something on them.
So I'm going to share so me of my favorite sp reads with you.
Very easy, all do-ahead... like two days ahead.
We'll do this one first.
Okay, this is a ve getable cream cheese.
Very simple-- I just have 12 ounces of whipped cream cheese that's softened.
I mean, you buy it whipped?
It is whipped cream cheese.
You can really use any cr eam cheese you want but I happen to li ke it whipped, so that's why.
But it's 12 ounces.
I'm putting in grated carrots.
And the red?
Those are radishes.
Oh, radishes!
And these are scallions.
Very finely diced scallions.
And these are cucumbers.
And you know a good idea is when you chop the cucumbers to squeeze them in a towel to get some of th e excess liquid out.
Otherwise they kind of br eak it down I little bit.
And that'll be fo r garnish.
And that's it.
Well, that's easy.
You can't have it ea sier than that, Julia.
But this can be do ne two days ahead and left in th e refrigerator.
Does it need salt and pepper, too?
It doesn't really need salt so I'm just going to put some pepper in.
Doesn't need salt.
No, I don't think so.
And I'm going to just put it in this bowl right here.
It's pretty, too, isn't it?
It is pretty, it's co lorful, it's textural.
And you can use an y vegetables you want I mean, you don't have to use mine.
Thank you.
And you just sm ooth out the top.
Over there I have smoked salmon and scallion spread.
Mmm, is the salmon all chopped up?
All chopped up.
And again, chopped scallions and I put a little bit of sc allions on the top of this.
Okay?
And what's this brown stuff?
Well, that's my favorite.
That's my chopped ch icken liver.
Are we going to do that?
We're going to do that right now!
Great.
Okay-dokey.
So, I have a big skillet.
And I'm going to use two tablespoons of rendered chicken fat.
( sizzling ) With that chopped garlic in there?
Yeah, chopped garlic an d two large onions... two large, big, fa t, Spanish onions.
Big ones, okay?
And we're going to caramelize them.
That means cooking them till they're nice and brown.
Right.
That's a beautiful color.
They've certainly reduced in quantity, haven't they?
Now what I'm going to do is push them to the side.
Then I'm going to cook my ch icken liver right in here.
Now I'm going to ad d butter to this-- this is not kosher chicken li ver, I'm not kosher.
A person who was wo uld not do that.
You'd keep with the chicken fat.
Add more chicken fat.
I happen to li ke the taste, th e richness of butter.
Mm-hmm, so do I.
What's a little mo re butter, right?
I'm going to add th ese chicken livers right to the center.
Probably fresh chicken livers.
They're beautiful, th ese are gorgeous.
We're just going to se ar them on each side.
Over high-- I'd like them to get even browner than that.
So I'm putting that ba ck on the other side.
What's happening is it's going to ca ramelize on the bottom.
So we'll just wait a se cond or two till it happens.
So, now they're se ared on both sides and I want to just st eam them through.
They smell good.
And I'm going to cover them an d turn the heat low... to help them cook through.
I don't want them to be too dark you want them to re tain a little pink color.
How long will that take?
A minute.
A minute or two, th at's it.
Do you think they're done now?
I think so.
Let's take a look.
Ah, they're gorgeous!
Now I'm going to ta ke my spatula and just... just to get all that yu mmy stuff on the bottom.
And I'm going to ra ise the heat again.
Yeah.
Just to caramelize it ju st a little bit more.
Let me just cut into one.
I think that's nice, do n't you think?
I think that's done.
Turn it off.
Okay, I just need my pot holder.
Now, are you going to put it in the food processor?
Right into, an d it can go in hot.
Doesn't matter.
And notice I haven't se asoned it yet.
It doesn't matter, I'm go ing to season it in there.
Okay... All of it, I want al l of that butter.
I want all of every si ngle thing that's in this skillet.
I want it in my food processor.
Every bit.
That has all that nice flavor.
And now, I'm going to put three hard-boiled eggs in here.
And now, chopped chicken li ver is a little bit like eating mashed potatoes.
It's got to be ve ry well seasoned.
Don't be stingy wi th the coarse salt.
You know, when you taste so mething like this when it's hot, it might se em a little overly seasoned but once it's chilled it dulls the flavors.
Needs over seasoning?
Yes.
Now I'm going to ju st process this.
Now we don't wa nt to make mush.
You want to ch op it in pulses.
It's nice to see li ttle flecks of egg white... Open it up...
I'm going to add a little bit more salts... and maybe a little mo re pepper...
Think we ought to taste it?
We're going to taste it... You have to go too, wh ere's yours?
Oh, that's really good-- it 's sweet!
Needs a little more salt.
Mmm, that's very... that's delicious.
Isn't that yum?
Those onions give the sweetness.
Yum, yum.
Okay.
And all you do at this point scrape it out in to a bowl, like this one.
Then you can take a nice de corating comb and, you know... ju st to comb the top.
You could use... Well, that's a good idea.
Yeah, but if you do n't have one you could use a serrated knife or a fork.
And now you ha ve a choice here.
You can garnish... A traditional garnish is minced onion that goes around the border but I'm going to use ca ramelized onions because I love them so.
I think that's much prettier.
I do, too.
There's something you sh ould know though.
When you're doing the ca ramelized onions for the border here yo u don't want to use butter.
You want to use an oil.
Because the butter will congeal.
And it changes th e texture and the lo ok of the onions.
Chicken fat wouldn't work so well, either, no.
It's very much like butter an d acts like butter.
Use a nice canola oil or something.
Yeah, a nice vegetable oil.
So now I'm just go ing to garnish the top by crushing a little bit of co arse salt between my fingers.
And add a little bit of freshly ground black pepper.
And that's it.
And that's ready to serve.
Yes, it is.
Do you think we should dig in?
I want to, I want to.
Which one do you want?
I like that one, I think.
You like sesame, ok ey-dokey.
I've been waiting all day for this.
So have I. I know.
We've been ve ry patient.
Ah!
Well, that's lovely.
Now, which one?
I'll have a little of the salmon, I think.
What are you going to have?
I'm going to have...
I think I'm going to have... Well, I'll let you tr y that first and then I'm going to go in to my chopped chicken liver.
Well, I have a knife here.
That's what I want.
This makes me happy.
I've never liked bagels until today.
Oh, I'm happy.
Because they were always were so, kind of dry.
Lauren, thanks so much.
I'm going to turn into a bagel factory, too.
And I just love knowing how to make these, thank you.
Thank you for having me.
Thank you.
Julia: Bon appétit!
Celebrate Julia Child
Get recipes, watch hundreds of episodes of her classic shows, read tributes from celebrity chefs, and more. Bon appetit!
Explore Now