♪♪♪ Boom!
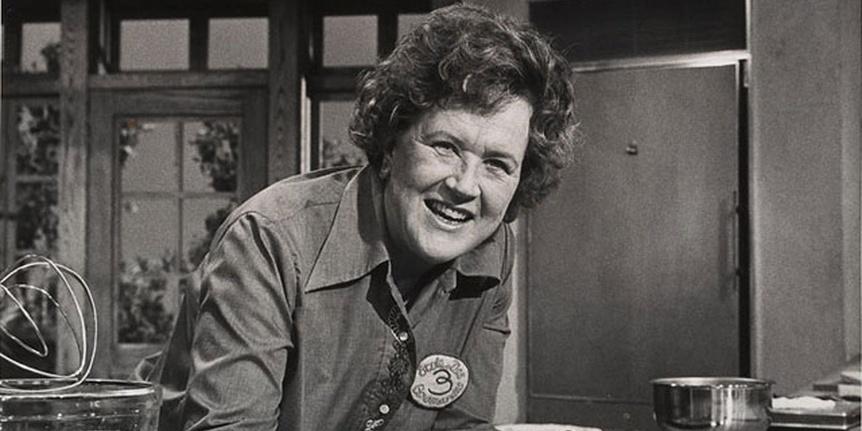
Hello, I'm Julia Child.
Welcome to my house.
What fun we're going to have baking all kinds of incredible cakes, pies and breads right here in my own kitchen.
Today, Norman Love executive pastry chef for Ritz Carlton Hotels adds a dollop of his own special artistry to a classic choux pastry as he teaches us how to make these chocolate-cinnamon beignets.
Join us on Baking with Julia.
I have here in my hand a choux, c-h-o-u-x or a little pastry "cabbage," the pate-à-choux.
You open it up and it's hollow and you can fill it with anything that you want.
And it's a very easy pastry to make.
Here's a chocolate one that has a beautiful caramelized banana.
And you wouldn't think that these were made from the same dough.
And you're going to make the dough, Norman.
I'm going to make a classical pate-à-choux recipe with a creative twist to it.
Good.
So, if we can, we 'd like to start.
Fine.
Okay, we're go ing to take a two- or th ree-quart saucepan and we're going to add a half a cup of water.
Mm-hmm.
We're also going to add a half a cup of milk.
And you can use any liquid you want for... for making one of these.
That's what's so wonderful ab out this recipe is that you're ab le to, um... any fruit purée any fruit juice, entirely water, entirely milk to create di fferent flavors.
Entirely bourbon whiskey, for instance.
That would be interesting.
That would be an in teresting choux.
We're going to add si x tablespoons-- a three-quarter stick of butter.
And that would be sweet butter-- unsalted butter.
Oh, plain, unsalted... Then we're going to add 1½ tablespoons of cocoa powder a teaspoon of cinnamon.
And also, I like to put two tablespoons of sugar... and about a quarter te aspoon of salt... a good pinch of salt just to help bring out so me of the flavors.
It always does with chocolate, too, doesn't it?
Most definitely.
Then we're going to take the casserole and we're going to put it on to the stove.
And we're going to bring this whole mi xture to a boil.
If you would, Julia, co uld you stir that fo r me?
Okay.
In the meantime I'm going to crack six... la rge... large eggs.
Okay, and also I need one cup of an all-purpose flour.
Okay, Julia, so it's starting to boil-- the milk and the water.
Our butter, our cinnamon, our cocoa powder a little salt and sugar.
Okay, I'm going to add-- and always add-- fl our all at one time.
While it's boiling?
While it's boiling.
And we're going to carefully stir in the flour.
You're going to start to notice... you start to notice so me of that lumping.
But as we continue to incorporate the flour with our mixture those lumps will wo rk their way out and we're going to form, ba sically, a roux.
You get a very, ve ry stiff mixture.
I think it's important th at we continue to cook for 30 seconds or on e minute over the fire until it starts to form a ball and actually leaves a skin on the bottom of the sauce pot.
Once it's complete fo rmed into a ball we're able to remove th at then from the fire.
I like to transfer in to a bowl.
A bigger one.
Yes, a bigger bowl, so that we're... make it a little bit easier for us to incorporate our whole eggs.
So by adding one or two eggs at a time we're able to sl owly start... incorporating the eggs.
It almost looks as if they weren't going to go in, doesn't it?
Yeah, at first it does, but if you continue the mixture will slowly break down... the eggs will slowly break down the mixture and will start to absorb the moisture of the eggs.
Then we'll add on e more egg.
Once you get the egg incorporated it goes a bit faster, doesn't it?
Yes, it does.
So once each egg is incorporated into the choux one more can be added until... We're looking for a fairly soft consistency but one that will still hold its shape and we're very close here.
That still has a lot of smell of that cinnamon and chocolate.
I think it's one of my favorites-- cinnamon and ch ocolate together.
It's such a wonderful aromatic taste.
So I think that th e consistency here that we look for is that as we touch th e spoon to the mixture the mixture comes slowly up and then falls bu t almost holds its shape.
That's a nice... And you may not need this egg at all.
That's right, so I think right now I'm happy with th e consistency of the choux paste.
Just a peak up... br ing a peak and it will slowly fa ll back into itself.
And think this is a consistency now.
Now, at this point you could make the little puffs if you wanted to.
Absolutely, the choux paste is finished at this point.
So, prior to this cr eative twist that we 're going to do you could either take teaspoonfuls and put on to a lined pan.
Or so you can bag-out... ba g with a pastry bag-- small choux or eclairs.
And now you're going to take it a step further.
We're going to refrigerate the mix and then we're going to incorporate some more flour into the mix by kneading.
Fine.
I'll put it in the fridge.
Thank you very much.
Julia, I have a half of... mixture of refrigerated dough.
That has a nice shiny look to it.
Okay, so I'm going to take some flour and I'm going to lightly fl our our surface.
I'm going to take this dough-- it's a very well chilled pate-à-choux-- and slowly start to incorporate the flour.
And we're looking for a consistency th at's pliable and ab le to be handled.
So, by working slowly on the surface...
So, I'm just wo rking the flour.
I want to feel that.
That's still very soft.
Mm-hmm.
It's so soft that it would be very, ve ry difficult to work with.
I'm going to take a little bit more flour.
So, now that the dough is starting to become pliable I'm going to knead a little bit more flour into it and try to develop a little bit of the gluten in the flour so the dough has a little bi t more substance to it-- a little bit more strength to the choux.
Okay, it's becoming very pliable now.
As you can see, I'm able to start to knead the dough.
I'm just incorporating the final flour that's on the table and I'm sure that will be sufficient.
I want to feel that again, though.
It's still... if you hold it...
It's still sticky but you can work with it.
Yes, we're going to lightly flour ou r surface.
At this point, I want to try to use a little flour as possible just to prevent sticking.
I'm going to take my rolling pin and we're going to try to roll out the dough as thin as possible.
The thinner the pastry, th e lighter the pastry.
It's important that we... ea ch time we roll our dough out that we move our dough.
Otherwise it will stick, yeah.
Exactly, take a little bit more flour.
But you should carefully handle the dough.
Not a lot of pressure when you put the dough because the dough is very soft and tender.
And each time I'm trying to relax the dough.
Mm-hmm.
And roll out an other piece.
Okay, once we get a very thin consistency we're going to cut our disks that are eventually going to be turned into our beignet.
So we're just carefully cutting the pastry.
And we're going to place those in the refrigerator in just a moment.
That is very... You really have to handle that very carefully, don't you?
I think it's... just easily placed in your hand and just let it slide right off your hand on to the pan.
So, we've cut out four of each-- different styles of beignet.
I think I'm going to take my dough and I'm going to... And, again, the scraps ca n be just kneaded ba ck together.
And we'll roll out one more time.
And I'd like to cut some decoration.
And we can make it right out of the dough.
Mm-hmm, that will be great.
So what I'd like to do is just by... cutting the edge... maybe cut a triangle-- just some kind of height, maybe-- a little bit of decoration fo r... to accompany our beignet.
I'll make some cuts into this.
Lay these pieces down just to refrigerate on the side.
So, once the pieces are cut we're ready for the refrigerator.
So a piece of plastic just lightly covering it just to keep some of the air off of it.
Keep, maybe, from forming a skin on top of the... of the pastry.
And it's just placed in the refrigerator for about an hour or so until it's nice and cool an d able to be handled.
Good.
Okay, the next step we 're going to do is be making th e filling for our chocolate- ci nnamon beignet.
I'd like to first start wi th pastry cream.
I think it gives a nice smooth creaminess to the inside of those beignets.
I like to put a beautiful, fr esh vanilla bean.
In this recipe we can put about a half.
I usually split my vanilla bean open.
Mm-hmm.
Open it a bit and then take the back of the paring knife... take the back of the paring knife and scrape all th at wonderful flavor and then put ev erything inside.
Those are the seeds and things.
The seeds are where we're going to get all that wonderful fl avor from.
We're going to al low that to boil.
In the meantime, I have three egg yolks in this bowl.
I'm going to add to that a third of a cup of sugar.
With a wire whisk I like to immediately start to incorporate the yolks and sugar.
The sugar has a tendency to burn the egg yolks.
So it's important just to ag itate the yolks a little bit.
Then I'm going to add two tablespoons of cornstarch.
That's the thickening.
You just really want to well incorporate your yolks and sugar.
You don't want to really build any volume of air into this mixture either.
So as we start to boil, th e first that I like to do is to take th e vanilla bean out of my mixture just very carefully.
I'm going to leave th e seeds in.
As the milk be gins to boil I'm going to add, ve ry slowly-- continuously stirring-- about half the liquid.
And it's important to stir that mixture as you're adding th e hot boiling milk so that you don't bu rn the egg yolks.
Mm-hmm, or scramble them.
Or scramble them, right.
We're going to go back to our boiling mixture and again, co nstantly stirring add our stream of eg g yolks and sugar, co rnstarch.
And as your mixture th ickens you stir more vigorously to ensure that you stay a nice, smooth consistency.
And I remove this fr om the fire.
Yeah.
I'm going to take a clean glass bowl and a rubber spatula.
I'm going to take that crême patissière.
To avoid any kind of skin I usually take a piece of butter and just lightly take the butter to the surface of the pastry cream and this will help to prevent any formation of a skin being formed on the surface.
We're putting a piece of plastic over top.
Keep the air off.
If you would put this in to the refrigerator.
And again, this ca n be made a day ah ead of time, and...
Okay... put it in.
I'd like to continue with a roasted walnut sauce that will be served with our beignet.
If you could turn that fi re on for me, please.
We're going to start with one pint of heavy cream.
One pint-- two cups.
Two cups.
We're also going to add one stick or eight tablespoons of butter.
This, again, is unsalted sweet butter.
That's right.
Also, I'm going to add a half a cup of sugar... And a half a cup of ground or finely ch opped roasted walnuts.
So, basically I take the walnuts-- wa lnut halves.
I place them in a 350-degree oven for about ten minutes until they're nice an d lightly browned.
It just gives them a little more taste.
Exactly.
If they get too dark you almost have a bitter taste to them afterwards.
I take the walnuts and I usually put them on a flat surface either with a rolling pin or a knife or even a food processor on pulse.
You're able to just coarsely ground so that we're able to see the nuts in the sauce.
Yes, you don't want a powder.
And then, lastly, I put one tablespoon of walnut oil.
And that you have to be careful that doesn't get rancid.
Keep them in th e refrigerator.
I think it will ex tend its life.
And I like to put just a little pinch of salt just to help bring out so me of that walnut flavor.
Mm-hmm.
I just like to mix my sauce carefully to ensure th at the sugar is you know, well distributed through, so that we don't have any chance of burning on the bottom of the pan.
Yeah.
And basically, what I'm going to do is just reduce.
I'm going to reduce the sauce to nappe till it beautifully coats the back of a spoon.
Fine.
Let's continue with the caramelized bananas.
Turn this fire up just a little bit to help get that pan nice... nice and hot.
That's going to be delicious.
In the meantime, I can ge t my bananas cut.
We're going to have tw o bananas.
Perfectly ripe, or doesn't it make...?
I think that perfectly ripe to ensure sweetness.
So I like to just cut the ends of my banana and cut the banana le ngthwise.
And then we'll just third the banana so we'll end up with six pieces.
Mmm .
We've gotten our pan very hot.
I'm going to add about half of our quarter-cup of sugar so an eighth of a cup.
Yeah, I like to ge t a portion of my sugar caramelized and then add th e remainder to it just to ensure that th ere's no lumps and again, at an even color.
Just carefully spread this around the surface of the pan which will help with the caramelize... You can actually...
It's starting to melt already.
Yes, it is, mm-hmm.
Well, that really is melting, isn't it?
Yes, it starts to melt and you start to gain a little bit of color.
As you see, you start to get some very, very light amber.
Mm-hmm.
I'm going to add the remainder of my sugar.
This really, I think, prevents the lumping.
Oh, that's...
So, you see how you get it very even, huh?
Oh, so that's a good... a good piece of advice.
So once it starts to come to color obviously, it's going to come very quickly.
So I like to... to just reduce the heat a little bit.
As soon as you get the color that yo u're looking for which is a... a medium-dark amber-- which is just about where we're at now-- I'm going to add my ta blespoon of butter.
I'm just going to mix that into the caramel and this is going to help st op the cooking of the caramel and of course, add some wonderful flavor.
And it'll... it'll... prevent it also from burning up, won't it?
Yes.
Once we have this beautiful caramel color I'm going to add my bananas, at this time, to it.
Little bit of cream.
A little bit of heavy cream.
Yeah.
About three tablespoons of cream.
And I like to sometimes put that in two parts, also.
Mm-hmm.
See, you put too much cold liquid in and you see how it starts to get...
Yes, immediately.
...the sugar starts to coagulate, so...
It will eventually melt back but you can actually even warm your cream to add to a caramel, which will... We're really making a caramel sauce and poaching our bananas in a caramel sauce.
Yes, we are.
So we've... we've reached now a very tender consistency.
And we can check that by... by putting our fork in and it's going to go in very, ve ry easily, and it's very soft.
Mm-hmm, yeah.
At this point, I'd like to take out my bananas and take them off the fire and I'm going to transfer them to a plate I have here.
We're going to allow that to cool.
So our sauce is just about reduced.
Yes, that certainly has thickened up, hasn't it?
A beautiful sauce consistency.
You can basically just put this aside.
Allow it to come to room temperature.
Mm-hmm, and then it'll thicken.
And it will thicken a bit now that it's very, ve ry, very hot.
As it comes to ro om temperature, an d should be served just at room temperature, warmed in a liquid state.
So we'll put this over to the side.
We'll allow it ju st to rest until we assemble ou r dessert.
Great.
Looks as though we're ready to assemble the final phase of things.
I think that we are.
I've taken the pastry cream back out of the refrigerator.
Mm-hmm, that's cold, now.
Yes, nice and cold.
I like to whisk the pastry cream a little bit just to smooth it back out.
I'm going to take our caramelized bananas.
Just carefully put them into our pastry cream.
Dump them all in.
I'll just carefully fo ld the two together.
I don't want to ma sh my bananas.
I want to keep some pi eces of the banana.
And you can see that the consistency has come back a little bit.
It's not as stiff as it was because of the caramel that was added but still on the stiff side.
I'll make a little bit of an egg wash.
Egg wash will he lp seal our beignet and make sure that ou r filling will stay in side properly.
I'm just going to scramble our egg in just a splash of water-- about a teaspoon.
I've brought with me a little... a little toy that I found being used in one of the other parts of the kitchen one day.
And I thought, "Wow, wh at a wonderful idea."
This is a pot sticker press.
Oh, which you could get in an oriental grocery store.
Exactly, or possibly a gourmet store where... used in filling those little meat-filled du mplings that they... You could use it for ravioli, too, couldn't you?
Exactly, so by taking on e of our cut pieces of pate-à-choux I can carefully put it inside.
Mm-hmm.
And take a tablespoon an d some of our filling to ensure that we get not only pastry cream but some little pieces of our banana.
Mm-hmm.
We put that in the center like that.
Well, that's just about... a bare tablespoonful, isn't it?
Yeah, ap proximately, yeah.
And just lightly... really lightly egg wash our edge there.
Mm-hmm.
And just by simply ta king our pot st icker press and sandwiching it together... That really is wonderful.
That's great.
You get a wonderful sc alloped edge.
That's very nice.
And a very consistent se aled beignet.
Yeah.
I've got a nice alternative.
By using just a piece of dough that we've used the crimped cutter and some light egg wash take just a small... sm all bit.
Not too much because as you... as you fold over, you want to make sure that the filling stays in the center that the filling stays in the center and not seeps out the side.
In other words, don't be greedy about the filling.
That's right.
What I do then is just carefully, with my finger seal the beignet.
Then I take a cutter... in the back of the cutter and just kind of lightly press... That's a good idea.
Just to kind of... just to kind of seal.
So then with a sharp knife or something with a flat edge, we can carefully lift up the beignet and then set th e beignet back down.
Mm-hmm.
And I'm going to cover our beignet with a piece of plastic.
We're going to put th ese in the freezer.
It can be up to ... to one day.
Three or four hours wo uld be wonderful-- just so that they're fr ozen enough to handle and that we're able to cook them quickly and that the filling do esn't get too hot in the interior.
Good.
I've preheated ou r vegetable oil to between 375 and 400.
So let's take a couple of these beignets and let's drop them ca refully into the oil.
( oil crackling ) What-- you do about four at a time?
I'm going to put... Let's do about three.
That ought to be okay.
What oil are you using?
Personally, I like to use a canola oil because of the lo w-saturated fat.
Mm-hmm.
But regular vegetable oil wo rks wonderfully.
And we're just looking fo r a nice even color.
Mm-hmm.
And see that the be ignets start to fl oat to the surface as they start to gain color.
So I try to turn so me of the beignets to brown on th e other side.
Mm-hmm.
So as our beignets st art to brown nicely it looks like th ey just need an other few seconds.
Mm-hmm.
We're going to tr ansfer them Mm-hmm.
to a... a paper towel so that any excess oil ca n be absorbed.
Yeah.
So...
I think we're okay.
Now our triangles.
And those are also frozen.
These were frozen just to make them easier to handle.
I'm going to lay this ri ght into the oil.
What's interesting ab out this is that if you want to form yo ur triangle you can just kind of put yo ur spatula down into it.
Mm-hmm.
And press the dough ri ght down into the oil.
Give it maybe a de corative bend to the... And I can see it's beginning to puff up.
That's nice, isn't it?
That's a fascinating look that sort of puffiness.
Kind of reminds me of the elephant ears from the county fair.
Yes !
They used to take some fried dough and dust it with po wdered sugar when I was a kid.
That's browning nicely, isn't it?
So, by just putting th at... that wire into it, as it fried it kind of gave us, li ke, a decorative bend.
That has an animalistic look, doesn't it?
Yeah.
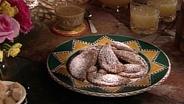
Some powdered sugar.
Mm-hmm.
I'm just going to lightly dust... dust our beignet.
I don't want to lose that beautiful brown color but just want to help enhance...
Okay.
So I think three is adequate for a portion.
I like to kind of set them on our plate.
Mm-hmm.
Okay, I have some melted chocolate and a cornet, th e trusty cornet-- a pastry chef's ri ght hand, left hand.
It's always close by.
We have illustrated how to make it in the book that goes along with this series.
Nice.
You take a pair of scissors and a really fine hole... just so we can... let a very fine st ream of chocolate.
Mm-hmm.
Just maybe... And a pipe.
Little bit of decor.
This will be some dots.
Mmm, that's very chic, isn't it?
And maybe some graduated dots here.
As with all of these things practice before you attempt it.
Okay.
I like some... maybe for some color we could put some fresh fruit.
And I have some... some strawberries.
Take maybe a... here, I've fanned the strawberry.
Can put a strawberry up here and a couple nice fresh raspberries.
This time of the year-- wonderful raspberries.
I'm going to take some of our beautiful sauce.
I guess we can kind of put some of that beautiful walnut sauce and I still smell the aroma.
It's just really filling the air.
Is that all-- the sauce?
I mean, that's all you do.
( both laugh ) You're making all of that...
I think we could serve... we could serve the de ssert like that with some sauce, an d then on the side.
Sauce on the side.
And then some more sa uce on the side.
Oh, yes!
( both laugh ) We can just maybe garnish with just a little sprig of fresh mint.
One of these de corations.
I mean, we can play ar ound with that.
There's really no thing correct in making dessert.
It's... it's... You just do it the way the spirit moves.
I think so.
So by just taking a piece of this... And even just fl owing like this and just to add some mo vement to the plate.
Could even, if you'd like, a little bit of... Just touch... touch with a little bit of sugar around the edge to... to finish our dessert.
Norman, that's a wonderful dessert and it's so nice to know that you can do something else with pate-à-choux.
And I thank you very, very much.
Thank you very much, Julia for inviting me in to your kitchen.
It's been a pleasure.
You'll be welcome every day.
Thank you again.
Thank you.
Julia: Bon appétit!